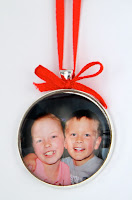
Christmas Ornaments can last a life time. So why not make some that you can look back at and go wow...How much have you grown...or ...See the braces were so worth it! Look at that smile!!! LOL
(My daughter is finally seeing that the pain of braces on her teeth, has so been worth it! Love that smile chook!)
So check out our easy instruction to help you make one or a dozen.. for your tree!
1.
Open a photo in microsoft word ( Or your chosen photo edit software) and click
on the format picture option. Crop the photo to the shape of your tile. This
is especially important if you are working with ovals and circles! You don't
want to cut anyone's head in half! Crop and resize the photo until you
have the dimensions of the tile you are working with. (When you are working in
the 'format picture' option of Word, and cropping the picture, a little box will
come up on the top right and it will have the changing dimension.)
2.
Change the page layout to 4 x 6 inches or 10 x 15cm borderless. Then save as a
Jpeg file.
3.
Print the image on a laser jet printer. I like to print mine at Officeworks. Then I can use diamond glaze directly on the photo, without any bleeding
of ink. If you are going to print on a bubble jet printer, you will need
to seal the image using "Modge Podge" first. This will stop the
ink from bleeding when you apply the diamond glaze.
4.
Then follow all the instructions from the previous post
Glass tile jewellery- more than just paper! Quick, Easy, Stunning!
Glaze,
Press, Cut, Glue. Then add a nice little red ribbon if you would like the
photo pendant used to decorate your tree!
We
have so many other great ideas for you to try. So please join our newsletter
and blog role.
AND to order any of the components needed for these projects please go to www.sunsetdesigns.com.au
So from Sunset Designs-
Merry Christmas!
Have
fun crafting – Kylie :)


